How to mount an additional storage disk on your azure VM
For this tutorial, I owe huge thanks to my fellow OpenAI Scholar, Alethea, who taught me how to do this. This is a writeup of Alethea’s in-person tutorial for me.
I will assume that you have an azure virtual machine (VM) already set up, and that you’re finding that you don’t have enough disk space. I also assume that you chose an Ubuntu (Linux) VM. (If you’re just getting started with virtual machines, I recommend a preconfigured data science machine).
- In a web browser, open your azure portal and go to your VM.
- “Stop” your VM, and wait until the machine is stopped.
- Select “Disks” from the panel on the left.

- Select “+ Add data disk”.
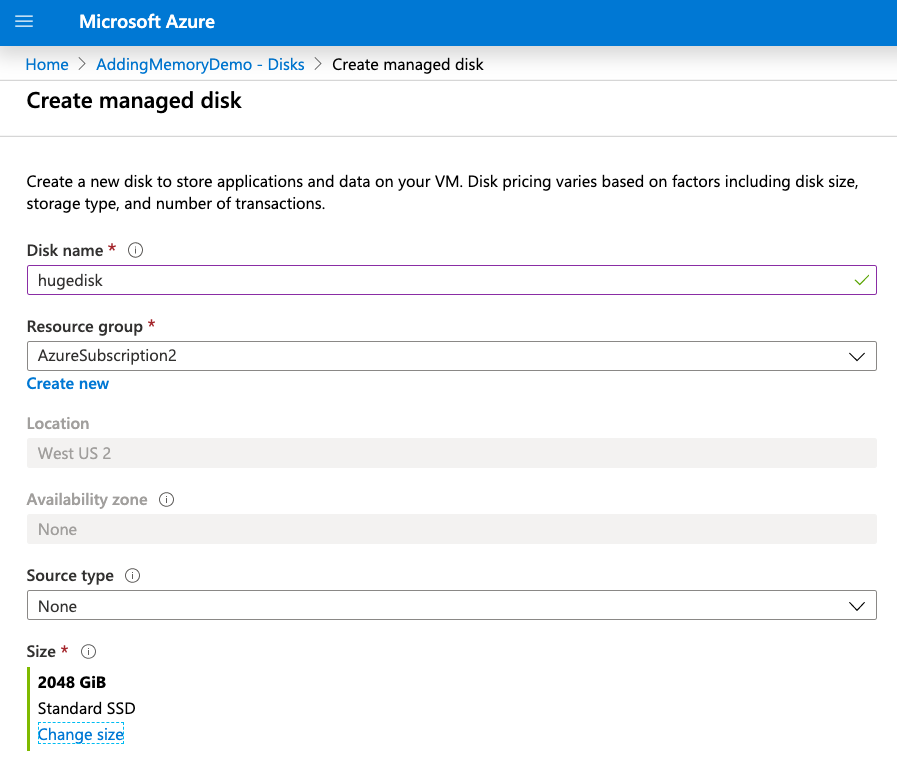
- Under the “Name” dropdown menu, select “Create disk”.

- Give it a name.
- Change the size to fit your needs. I recommend 2048 GB = 2T.
- (You can leave the rest as the defaults.)
- Select “Create”. (…and wait).
- Select “Save”. (…and wait).
- Return to your VM (by selecting “Overview” in the left panel), and select “Start”. (It might help to refresh the page, so you can see once it loads). (…and wait).
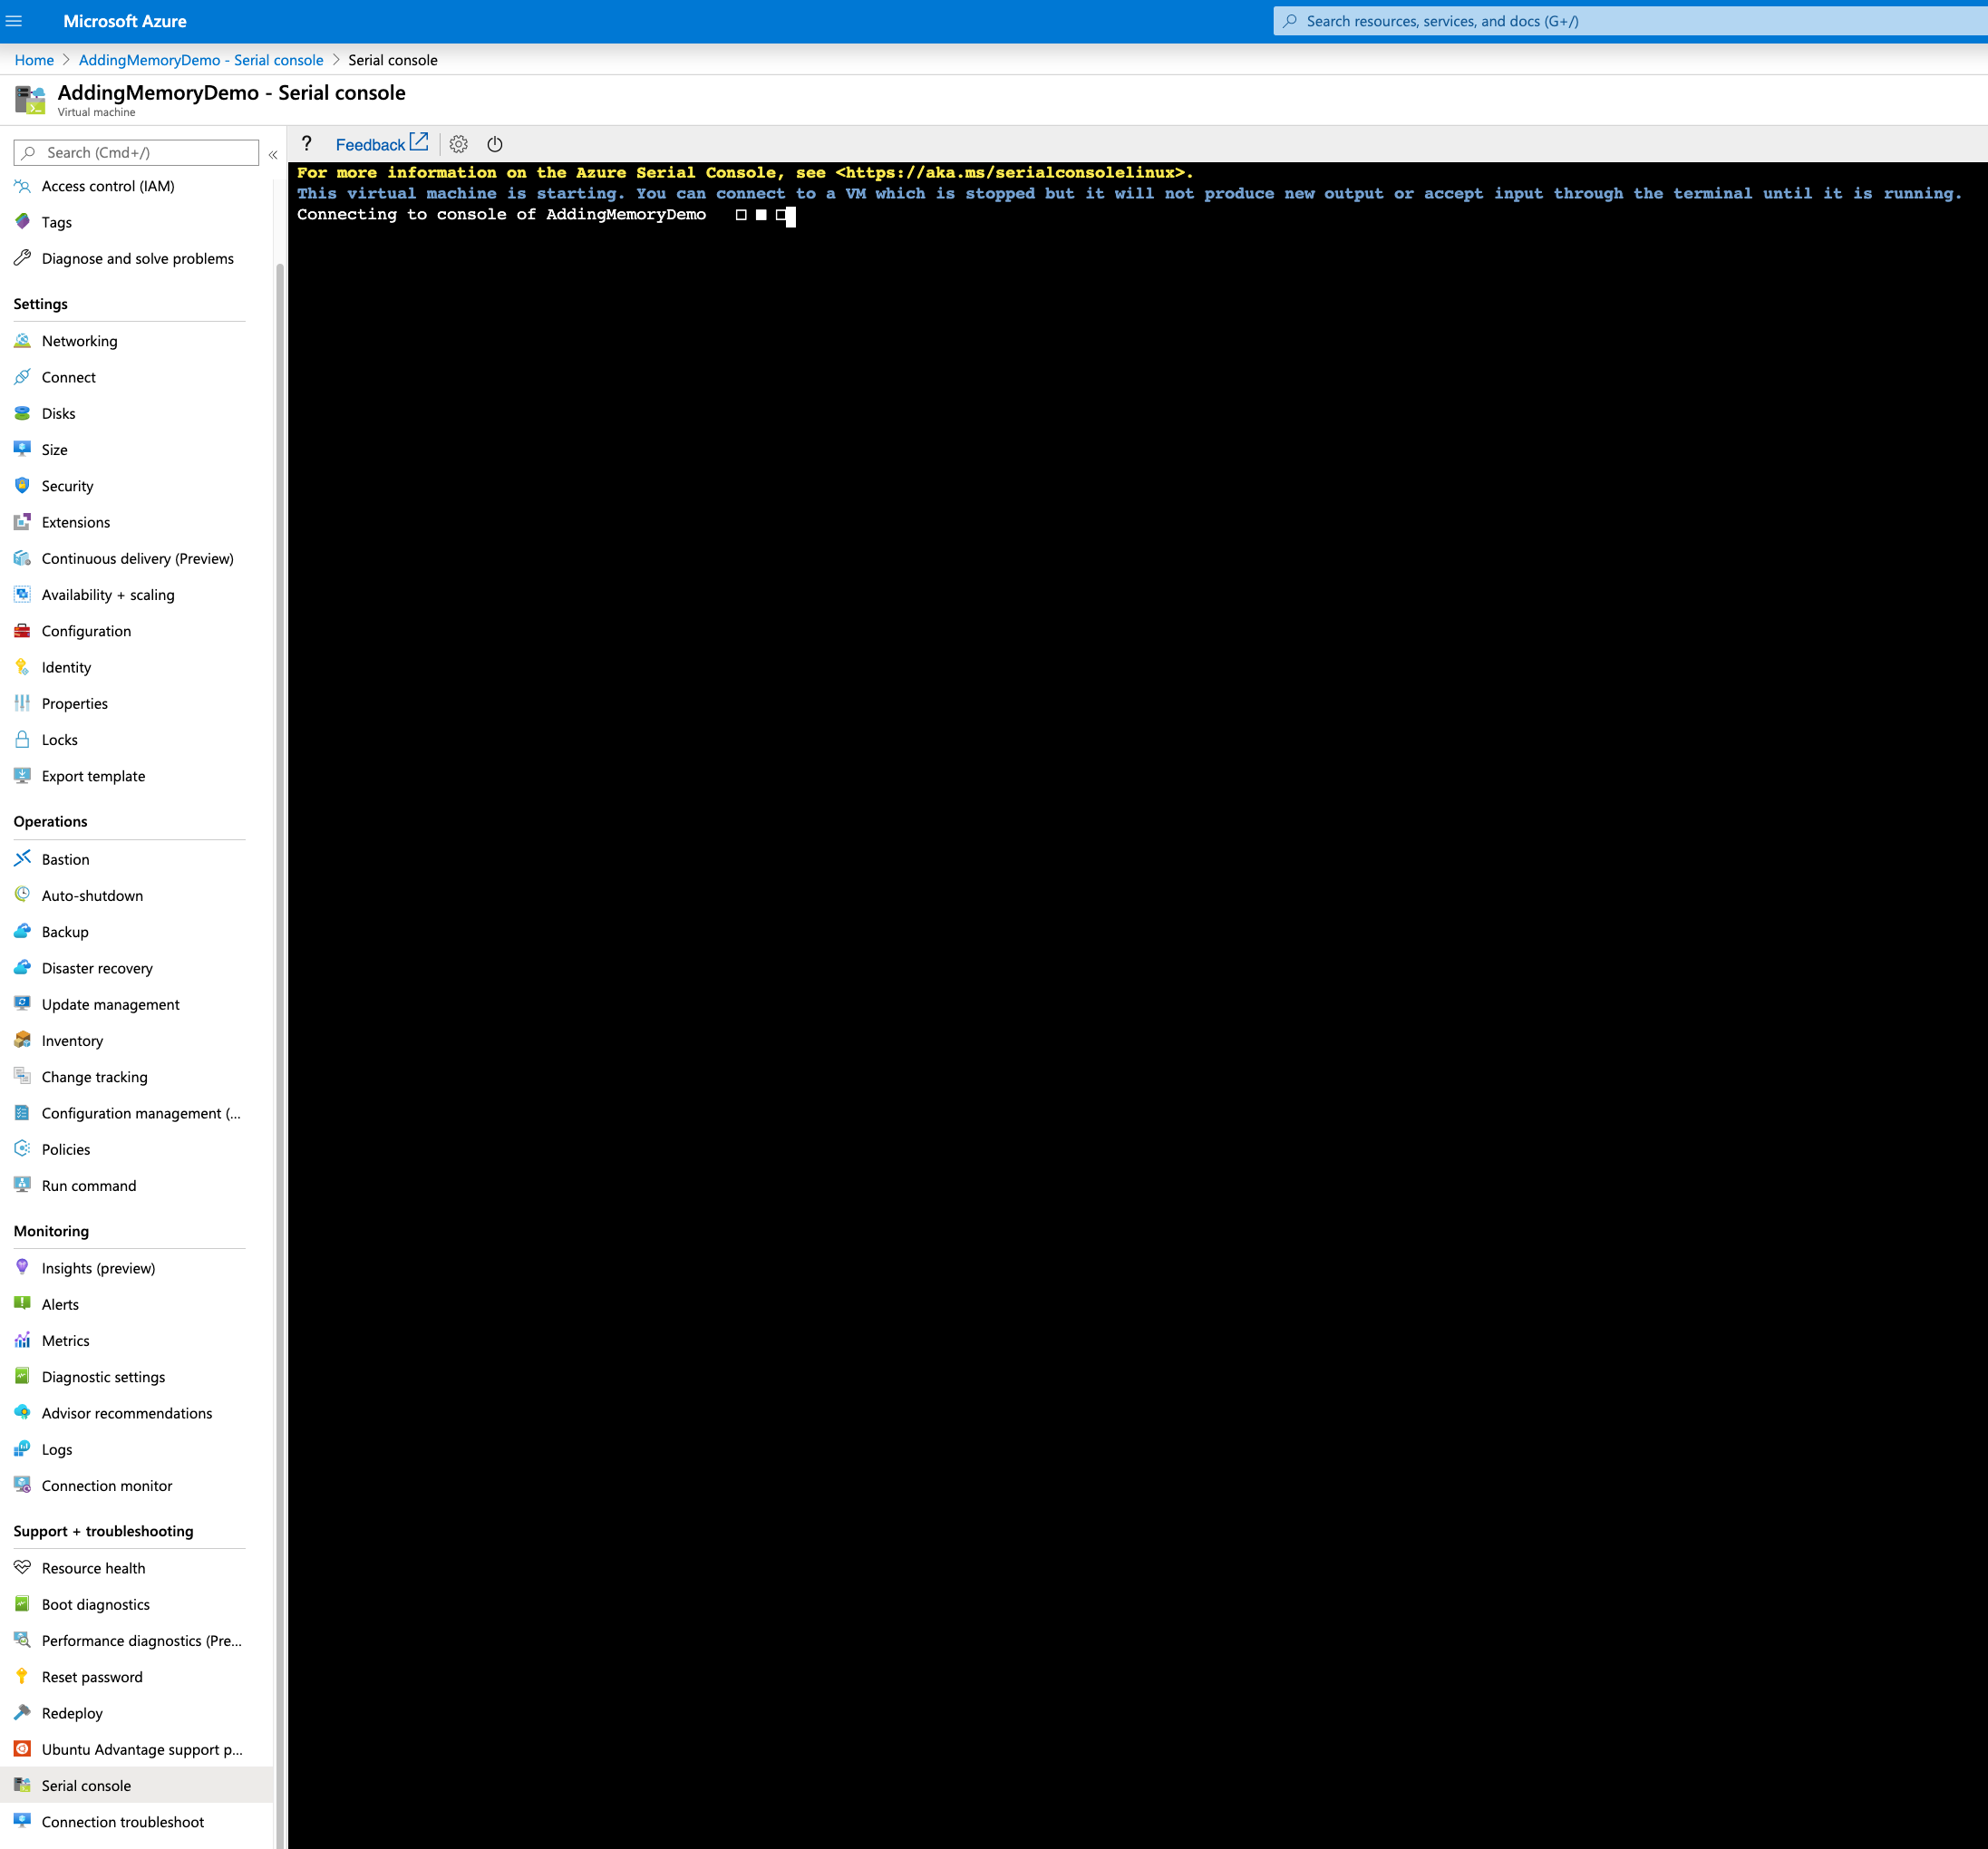
- While you wait, you can observe your machine as it’s starting up by selecting “Serial console” in the left-hand panel. (If your VM throws a tantrum in the future, the serial console can be your point of entry for logging in and rescuing your work.)

- While you wait, you can observe your machine as it’s starting up by selecting “Serial console” in the left-hand panel. (If your VM throws a tantrum in the future, the serial console can be your point of entry for logging in and rescuing your work.)
- Go to terminal on your local computer, and ssh into your VM.
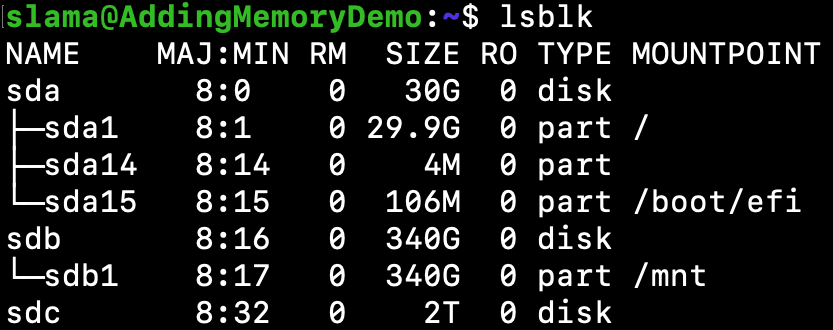
- In your VM terminal window, type
lsblk.
- Looking at the output of
lsblk, think of each row as a hard drive. Search for the one (underNAME) that has the large storage (underSIZE) that you selected. In my case, it’ssdcbecause I can see that it hasSIZE,2T. - You can now set a variable to help you keep track of your disk name:
BIGDISK="sdc".
- Looking at the output of
- Now pay attention, because if you get this wrong, you might destroy your VM (but no pressure ofc):
- In your VM terminal, type:
sudo fdisk /dev/$BIGDISK - In my case, this will be:
sudo fdisk /dev/sdc
- In your VM terminal, type:
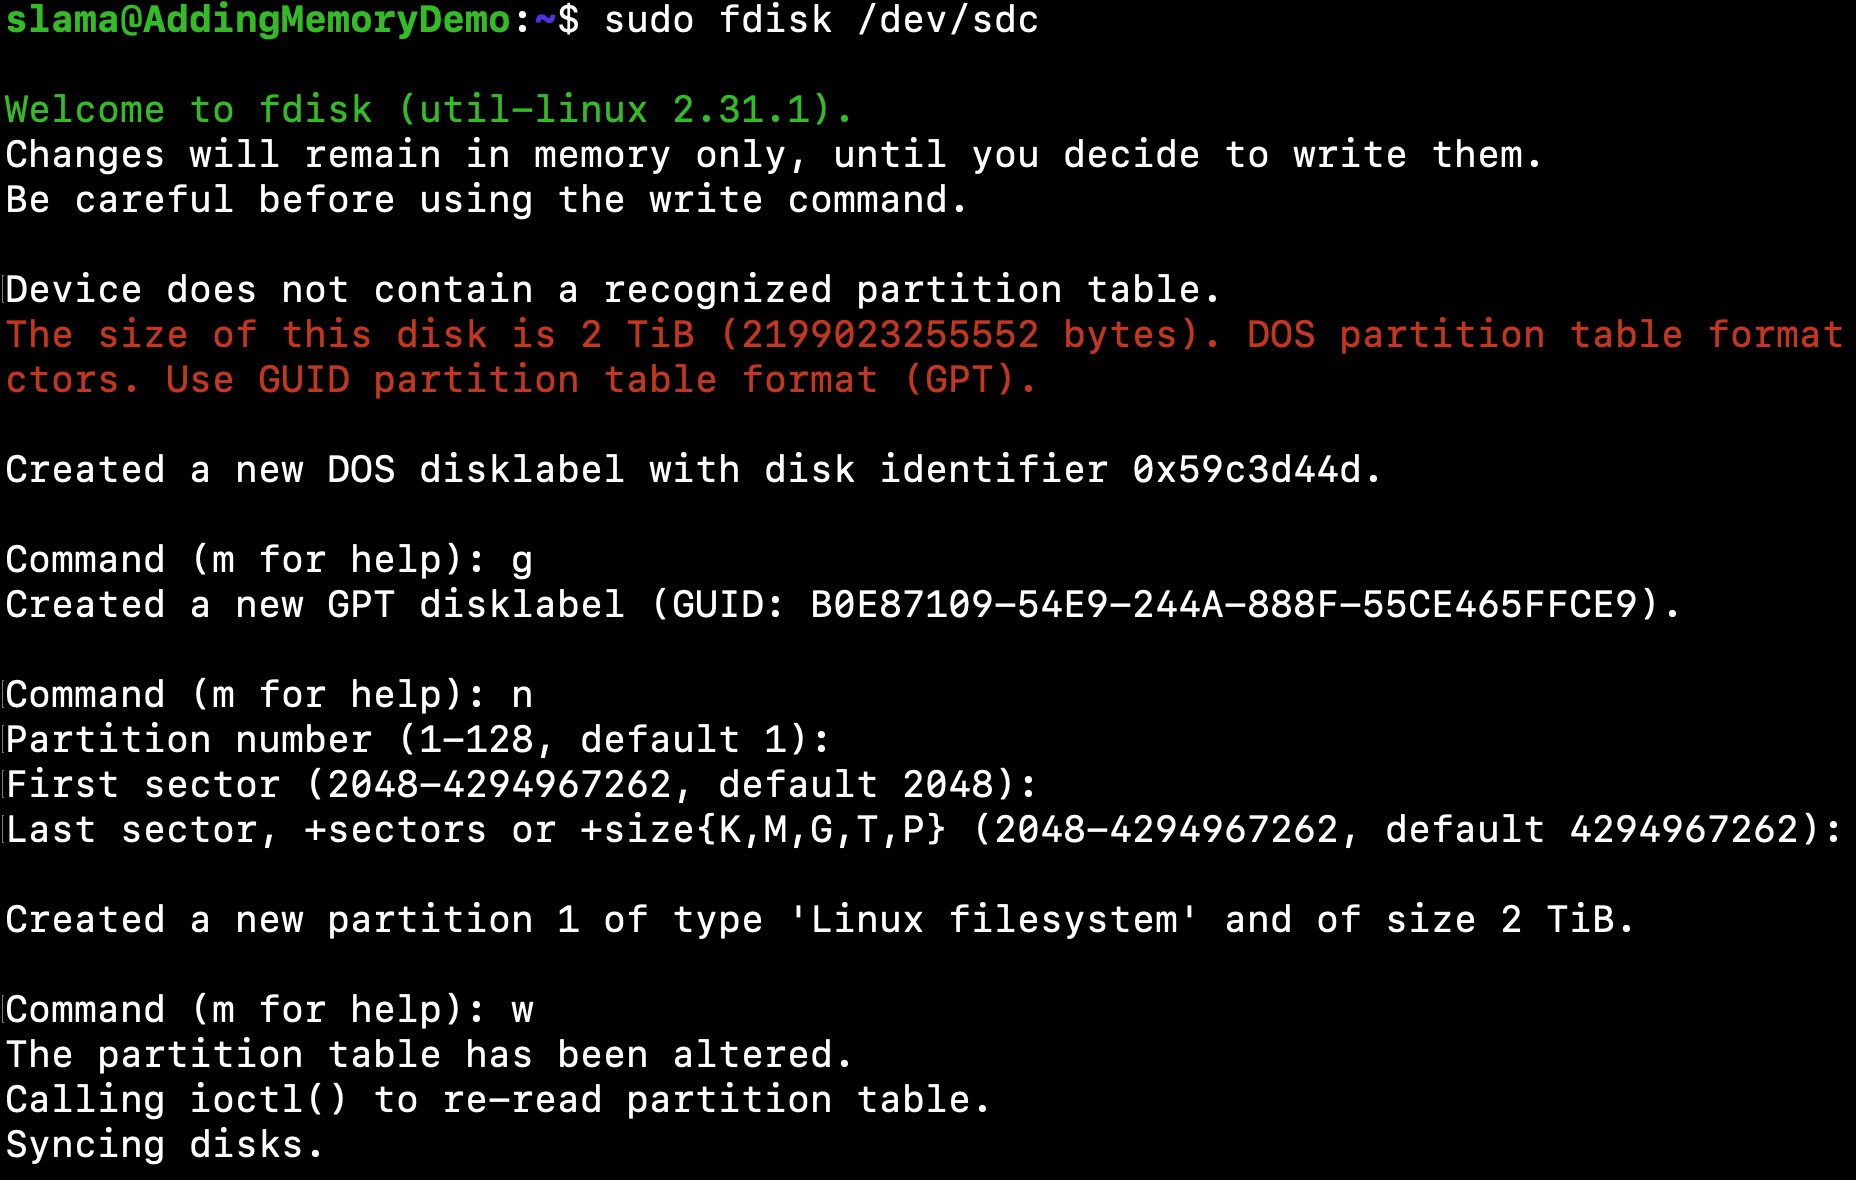
- In the fdisk program (after
Command (m for help):), type:g(This creates a partition table on your disk.)n(This creates a partition.)- You will be asked three questions: Hit
Enterfor each of them to select the default option. - It will confirm that it created a partition for you (a single partition for the entire hard drive).
- You will be asked three questions: Hit
w(This applies all the commands above to the disk you created).- The fdisk program now finishes and returns you to your VM terminal.
- You now have a partition table on the large hard drive that you created.
- Back in your VM terminal, you now want to create a file system on your partition:
sudo mkfs -t ext4 -j -L bigdisk /dev/${BIGDISK}1- Don’t forget the 1 at the end
- In my case, this would be:
sudo mkfs -t ext4 -j -L bigdisk /dev/sdc1- The
mkfscommand makes the file system. ext4is the default file system for Linux.-Ladds metadata to the file system: It gives a persistent handle for automatic mounting.- Our handle is
bigdisk. We will refer back to it later.
- Our handle is
- The
- Now we will create a directory, where we will mount the disk. In your VM terminal, type:
sudo mkdir /largedisk
- Next, we will edit the
fstabconfiguration file: This will make our disk automatically mount to our preferred location (/largedisk) in our file system whenever you boot your VM. (Trust me, you don’t want to repeat this process every morning.) In your VM terminal, type:sudo nano /etc/fstabnanois a text editor that allows you to look at thefstabfile and add a line to it.
- In the
fstabfile, which you are accessing through thenanotext editor, add the following words, separated by space(s), all on a single line:LABEL=bigdisk /largedisk ext4 defaults,rw 1 2LABELmeans: Look for a file system that has this label. Recall that we set the label tobigdiskpreviously./largediskis where we want to mount our partition.defaults,rwmeans: Keep all the defaults, but make sure that we have permission to read and write to this directory.1 2are flags that tell Ubuntu to automatically mount the partition upon booting.
- Press
Ctrl+oon your keyboard to tell nano to save the file.- It will ask you if the file name is OK: Press
Enter.
- It will ask you if the file name is OK: Press
- Press
Ctrl+xto exit nano. This will return you to your VM terminal.
- In your VM terminal window, type
- Reboot the VM.
- Exit your VM from your VM terminal (by typing
exit). You are now in your local computer’s terminal. - Go to your azure portal in a web browser, and navigate to your VM. Select “Restart”.
- You can again observe what your VM is up to in the “Serial Console”.
- ssh back in from your local machine’s terminal.
- (The reason why we did this is because we’re going to change the owner of the big disk that you created. Restarting makes the disk actually mount to the correct directory. If the disk is not mounted, you would change the owner just of the directory on your smaller original drive, not of the big storage disk that you created.)
- Exit your VM from your VM terminal (by typing
- In your VM terminal, type:
mount | grep largedisk- You should now see an output like this:

- You should now see an output like this:
df -h | grep largedisk- You should now see an output, which shows the (correct) amount of storage on your disk:

- You should now see an output, which shows the (correct) amount of storage on your disk:
sudo chown $USER /largedisk- This changes the owner of your big disk, so you can write to it without calling
sudoall the time.
- This changes the owner of your big disk, so you can write to it without calling
- You are DONE! (If you like, you might do
touch /largedisk/success.txtjust for the satisfaction.) Happy saving.